ROS Essentials
Subscribing to a ROS topic
The Jupyter-ROS tools help publish and receive messages in a Jupyter notebook.
For publishing, the package contains tools to automatically generate widgets from message definitions. For receiving, the jupyter-ros package contains a helper that redirects output to a specific output widget (instead of spamming the entire notebook).
import jupyros as jr
import rospy
from std_msgs.msg import String

rospy.init_node('jupyter_node')
jr.subscribe('/sometopic', String, lambda msg: print(msg))
This creates a output widget, and buttons to toggle (stop or start) receiving messages. Internally, jupyter-ros will save a handle to the subscriber thread. Note that we did not use the rospy-way of creating a subscriber, but delegated this to the jupyter-ros package.
If we now send a message from a JupyterLab terminal, we see message being printed to the output widget below the cell where we executed the jr.subscribe.
$ rostopic pub /sometopic std_msgs/String "data: 'hello jupyter'" -r 10

Publishing to a ROS topic
In the same way we can publish to a ROS topic by using the jr.publish helper.
import jupyros as jr
import rospy
from std_msgs.msg import String

rospy.init_node('jupyter_node')
jr.publish('/sometopic', String)
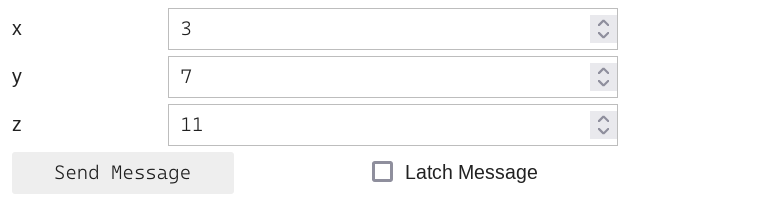
This results in a jupyter widget where one can insert the desired message in
the text field. The form fields (jupyter widgets) are generated automatically
from the message definition. If a different message type is used, different
fields will be generated. For example, a Vector3 message type contains
three float fields (x,y, and z) for which we will get three FloatTextField
instances; these can only hold float values (and not text).
from geometry_msgs.msg import Vector3

jr.publish('/vectortopic', Vector3)
Calling a ROS service
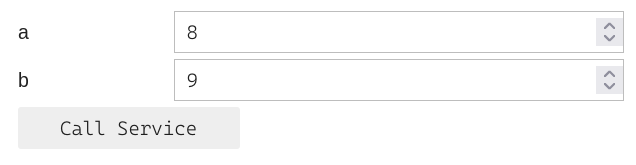
The same principles of publishing and receiving messages are applied for calling ROS services from a Jupyter notebook. Assuming that the service for adding two integers is available, a service client widget can be created with the following:
import jupyros
import rospy
from rospy_tutorials.srv import AddTwoInts

rospy.init_node('service_node')
jupyros.service_client('service_name', AddTwoInts)
The generated widget will change depending on the message type being passed.
Calling a ROS action server
A widget can also be created to call ROS action servers.
import jupyros
import rospy
from actionlib_tutorials.msg import FibonacciAction, FibonacciGoal

rospy.init_node('action_node')
As an example, the Fibonacci server can be initialized from a JupyterLab terminal.
$ rosrun actionlib_tutorials fibonacci_server.py
The widget for the server called 'fibonacci' can then be generated as follows:
jupyros.action_client('fibonacci', FibonacciAction, FibonacciGoal, callbacks={})

The fields for the widget depend on the definition for the action goal.
Turtlesim
A widget for the most popular turtlesim animation is also included in Jupyter-ROS. The widget can be displayed with the code below, showing the default parameters.
import jupyros
import rospy
from jupyros import TurtleSim

turtlesim = TurtleSim(width=1600,
                      height=1600,
                      turtle_size=100,
                      background_color="#4556FF")

display(turtlesim.canvas)
When initialized, the widget will display a single turtle in the center of the canvas. The turtle images are randomized, so different turtles will appear after each run. Multiple turtles can also be spawned on the same canvas given a desired position (within the canvas limits) and orientation.
turtlesim.spawn(name="turtle2", pose={"x": 630,
                                      "y": 1260,
                                      "theta": math.radians(90)})
The turtles can be moved around by subscribing to topics such as /turtle1/pose to receive new Pose messages.
# Retrieve current poses of the two turtles
new_poses = {"turtle1": turtlesim.turtles["turtle1"].pose,
             "turtle2": turtlesim.turtles["turtle2"].pose}

# Change the pose for the second turtle
new_poses["turtle2"] = {"x": 800, "y": 300, "theta": 2.5}

# Update the canvas
turtlesim.move_turtles(new_poses)